Invisible Woman Guide: Abilities, Counters & Tips | Marvel Rivals
Marvel Rivals Invisible Woman – Complete Guide
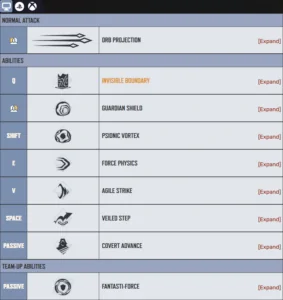
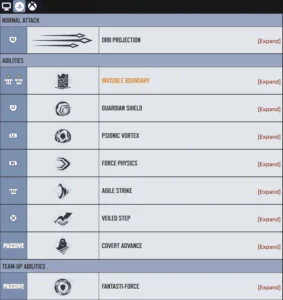
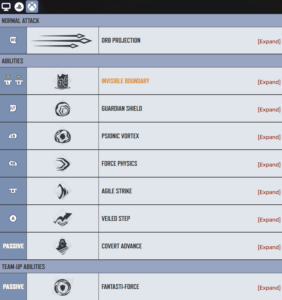
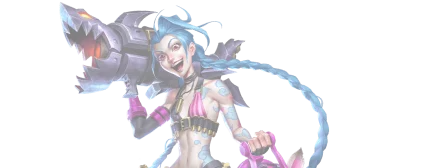
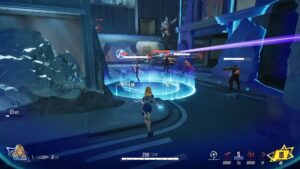
Invisible Woman’s Abilities (Images via Marvel Rivals Wiki)
Last Updated: Jan 9th, 2025
Author: Darren Buser
Invisible Woman is Marvel Rivals’ most versatile Strategist and one of Season 5’s breakout stars. Sue Storm manipulates force fields and light to protect allies and control enemy positioning through crowd-control effects. After receiving significant buffs throughout recent patches, culminating in Season 5’s November 14, 2025 update, she’s become one of the top healers in the current meta. Ranked as S+ tier in our comprehensive tier list, her combination of consistent healing throughput, damage mitigation via barriers, and team-wide invisibility ultimate makes her incredibly impactful across all skill levels.
Role: Strategist (Support)
Difficulty: 4/5
Best For: Brawl compositions, peel-heavy teams, protecting backline carries
Key Strengths:
- Healing throughput rivals top-tier supports like Rocket Raccoon and Luna Snow
- Guardian Shield provides 250 HP barrier that also heals nearby allies
- Invisibility passive provides self-sustain and escape options
- Ultimate grants team-wide invisibility with healing over time
- Multiple crowd control tools (knockback, pull, slow) for peel and disruption
- Higher base HP (300) compared to most Strategists
Looking for teammates who’ll actually play around your force fields? GameTree’s Discord LFG bot helps you find Marvel Rivals players who understand proper positioning. Just type /lfg Marvel Rivals in any server with GameTree installed—no signup required for basic matchmaking.
Quick Overview: Sue Storm’s Playstyle
Invisible Woman functions as a balanced support who excels at mid-range engagements. Unlike pure healers who stay in the backline, Sue positions herself 15-20 meters behind her frontline tanks, close enough to heal with Orb Projection’s piercing shots while far enough to utilize her invisibility escape options. Her kit rewards smart positioning—standing near your Guardian Shield provides healing over time while your passive invisibility keeps you safe from flankers.
The key to mastering Sue Storm is understanding when to play aggressively versus defensively. Her invisibility passive (Covert Advance) activates after 5.5 seconds without attacking, granting healing over time and immunity to auto-target abilities. This means you can disengage mid-fight, turn invisible, self-heal, then re-engage with full resources. Combined with her double jump (which also triggers invisibility), she’s surprisingly slippery for a support.
Abilities Breakdown
Primary Fire: Orb Projection (Left Click)

Invisible Woman’s Primary Fire in Marvel Rivals (Image via NetEase Games)
Description:
Launch force field orbs that pierce through all heroes, traveling to maximum distance (approximately 30 meters) before returning to Invisible Woman. Orbs damage enemies and heal allies on both the initial path and return trajectory.
Statistics (As of December 2025):
- Ally healing: 60 HP per orb hit
- Enemy damage: 40 damage per orb hit
- Projectile speed: Medium (buffed in Season 5)
- Range: ~30 meters before auto-return
- Piercing: Yes, affects all heroes in path
- No damage falloff at any range
Tactical Tips:
- Position to maximize value: Stand where you can hit multiple allies/enemies with each orb. The piercing property means one shot can heal 2-3 teammates simultaneously
- Angle optimization: Orbs return after reaching max distance. Fire down long corridors or at grouped allies so the return path continues healing
- Reload management: You can reload without breaking invisibility, making it safe to top off ammo while hiding
- Combat rhythm: Fire 3-4 orbs → move to cover → reload while invisible → repeat. This pattern maximizes uptime while minimizing vulnerability
- Synergy note: Orb Projection’s consistent healing output pairs perfectly with Guardian Shield’s healing over time for 120+ HP/second on priority targets
Advanced Positioning:
On payload maps, stand slightly behind the payload itself. Your orbs pierce through the payload to heal allies on the opposite side while damaging enemies pushing from the front. This creates cross-angle healing that’s difficult for enemies to interrupt.
Secondary Fire: Guardian Shield (Right Click / E Key)
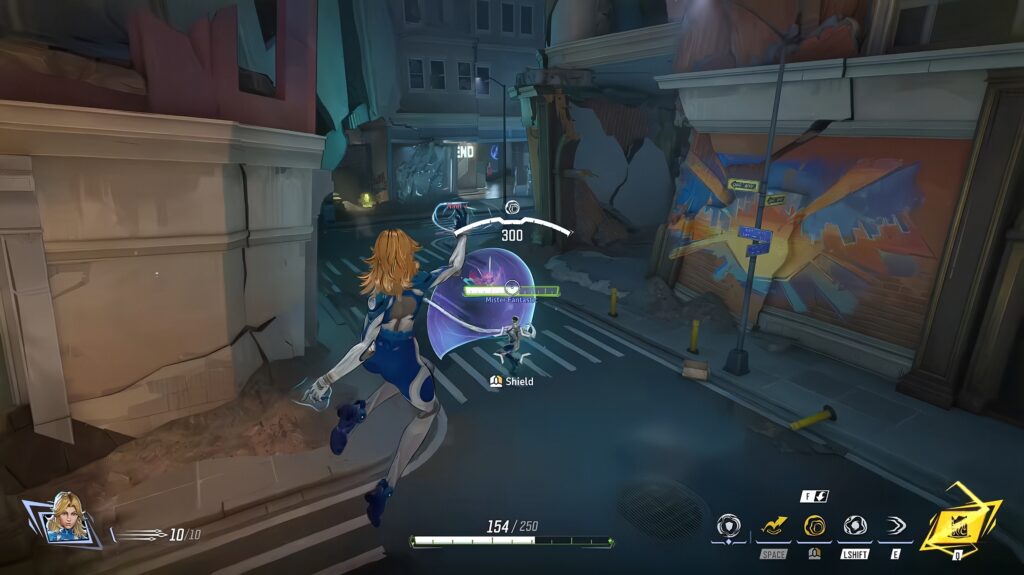
Invisible Woman’s Guardian Shield in Marvel Rivals (Image via NetEase Games)
Description:
Generate a medium-sized energy barrier directly in front of a selected ally (or yourself if no ally is targeted). The shield absorbs damage, slows nearby enemies by ~25%, and provides healing over time to allies within its radius.
Statistics:
- Shield HP: 250 (durable but breakable)
- Duration: Infinite until destroyed or manually reclaimed
- Cooldown: Begins when shield is destroyed or reclaimed
- Allied healing radius: ~5 meters from shield
- Healing over time: 15 HP/second to allies near shield
- Enemy slow: 25% movement reduction when passing through
- Special: Can be repositioned to new ally without cooldown penalty
Tactical Tips:
- Dynamic repositioning: Press the reclaim button to retrieve your shield and recast it elsewhere instantly. This lets you adapt to changing team fights without cooldown punishment
- Priority targets: Shield your main tank when they engage, or your backline carry when being dove. Don’t leave shields on full-HP teammates in safe positions
- Healing stacking: Stand near your own shield to receive its healing over time while using Orb Projection to boost healing output further
- Zone control: Place shields on contested objectives. Enemies must either destroy the 250 HP barrier or path around it, both of which slow their push
- Ultimate synergy: Shield placement matters during Invisible Boundary. Position shields at choke points inside your ultimate so enemies can’t easily contest without taking both slows
Common Mistake:
Many Sue players cast Guardian Shield once at match start and forget about it. The shield loses value sitting on one static position. Actively reposition it every 10-15 seconds based on where the fight is happening.
Mobility: Covert Advance (Passive) + Veiled Step (Double Jump)
Passive: Covert Advance
Invisible Woman’s Covert Advance in Marvel Rivals (Image via NetEase Games)
Description:
Automatically turn invisible after 5.5 seconds without attacking or taking sustained damage. While invisible, gain healing over time and immunity to auto-target abilities (Star-Lord’s Galactic Barrage, lock-on ultimates).
Statistics:
- Activation time: 5.5 seconds of non-combat
- Healing over time: 20 HP/second while invisible
- Auto-target immunity: Yes (immune to Star-Lord ult, tracking abilities)
- Broken by: Taking sustained damage OR attacking with any ability
- Visual tell: Faint shimmer effect visible to enemies at close range
Mobility: Veiled Step (Space Bar x2)

Invisible Woman’s Veiled Step in Marvel Rivals (Image via NetEase Games)
Description:
Double jump that automatically triggers invisibility unless taking sustained damage. Provides significant vertical mobility for reaching high ground or escaping dive threats.
Statistics:
- Jump height: ~8 meters vertical (higher than most heroes’ single jump)
- Invisibility: Instant activation on second jump
- Cooldown: None (limited by gravity/landing)
- Combat use: Escaping melee divers, dodging AoE ultimates, repositioning
Tactical Tips:
- Defensive priority: Save Veiled Step for emergency escapes. Don’t waste it taking unnecessary high ground when your team is safe
- Dodge timing: Use double jump to avoid ground slams (Hulk, The Thing), dashes (Magik, Daredevil), and AoE damage fields
- Height advantage: Many maps have elevated positions accessible only with double jump. These spots provide better Orb Projection angles
- Combo with passive: If you’re at low HP, double jump to immediately go invisible, then stay in the air briefly to let Covert Advance’s 20 HP/second healing kick in before landing
- Team fight positioning: When your frontline engages, double jump backward to create distance from the chaos while maintaining healing angles
Pro Tip:
Against Daredevil (who can see invisible enemies via Radar Sense), your invisibility is still valuable—it breaks auto-target tracking and forces him to aim manually. Double jump creates unpredictable movement he can’t easily track.
Crowd Control: Force Physics (Shift) + Psionic Vortex (Q)
Force Physics (Knockback)
Invisible Woman’s Force Physics in Marvel Rivals (Image via NetEase Games)
Description:
Release a force wave that knocks back enemies in a cone in front of Sue Storm. Primary peel tool against divers and melee threats.
Statistics:
- Knockback distance: ~10 meters
- Cone width: ~90 degrees
- Cooldown: 8 seconds
- Damage: Minimal (30 damage)
- Utility: Interrupts channeled abilities, displaces enemies off objectives
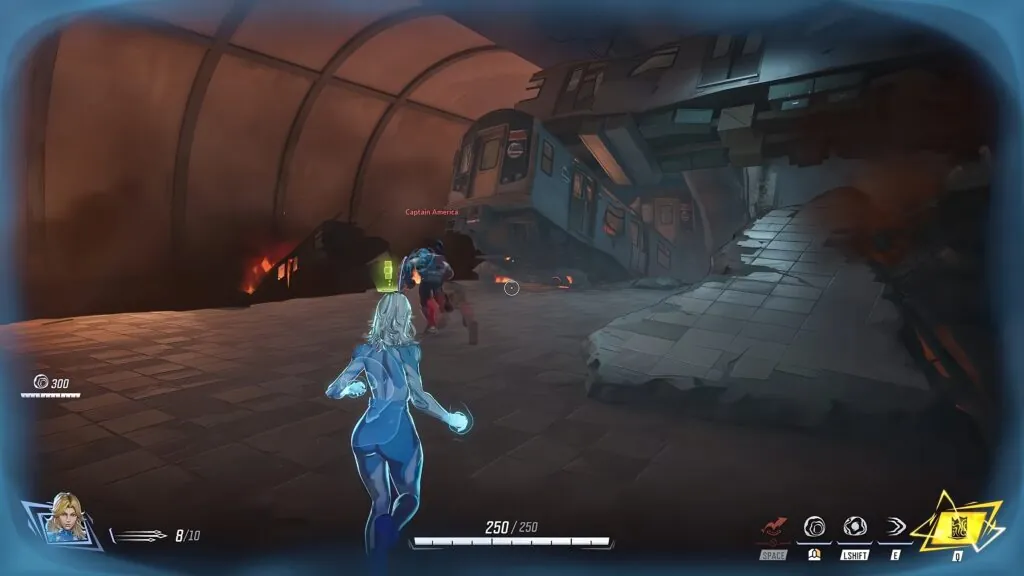
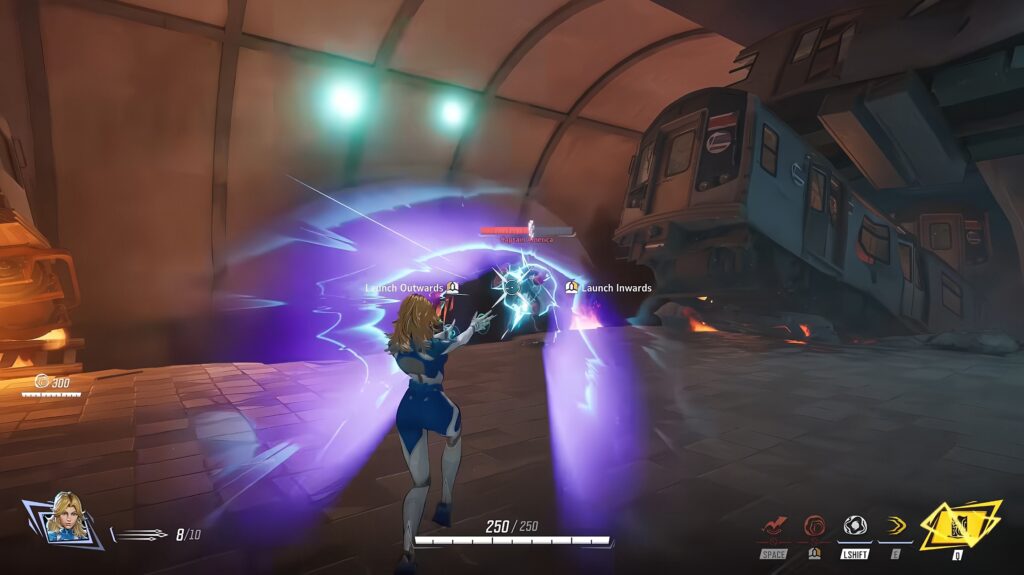
Psionic Vortex (Pull + Damage Over Time)

Invisible Woman’s Psionic Vortex in Marvel Rivals (Image via NetEase Games)
Description:
Gather psionic energy and cast it forward. Upon hitting a target, terrain, or manually reactivating, the energy erupts into a vortex that continuously pulls enemies toward its center while dealing damage over time.
Statistics (Season 5.5 Buffs):
- Vortex duration: 4 seconds
- Pull strength: Medium (enemies can still move but are slowed significantly)
- Damage: 25 damage per second (100 total over duration)
- Cooldown: 10 seconds
- Cast type: Single-cast projectile with delayed activation
- Range: ~25 meters
- Pull radius: ~6 meters from center
Tactical Tips:
- Combo potential: Force Physics into Psionic Vortex. Knock enemies into a cluster, then cast vortex on the group for maximum pull value
- Environmental kills: On maps with ledges (Klyntar, Tokyo 2099), use Force Physics to knock enemies toward edges, then vortex to drag them off for instant eliminations
- Peel priority: Force Physics is your only instant peel. When Spider-Man or Psylocke dive you, use knockback immediately—don’t wait for them to land hits
- Objective denial: Cast Psionic Vortex on contested payload/control points. Enemies inside take constant damage and can’t easily leave the pull radius
- Team coordination: Call out vortex placement in voice chat. Teammates can focus fire enemies trapped in the pull for easy eliminations
Advanced Strategy:
Psionic Vortex works through thin walls. Cast it on the opposite side of cover where enemies are hiding. The pull effect goes through terrain, dragging them into your team’s line of fire.
Ultimate: Invisible Boundary (Z Key / Triangle)
Invisible Woman’s Invisible Boundary in Marvel Rivals (Image via NetEase Games)
Description:
Manifest an unseen force field within a chosen area (cylindrical zone), rendering all allies inside undetectable to enemies while providing continuous healing over time.
Statistics (Season 5.5 Adjustment):
- Ultimate cost: 4,300 points (increased from 4,000 in Season 5.5 nerf)
- Duration: 8 seconds
- Healing over time: 30 HP/second to all allies inside
- Invisibility: Complete (allies don’t appear on enemy screens)
- Enemy slow: 25% movement reduction when passing through boundary
- Radius: ~8 meters (cylindrical area)
- Cast type: Targeted ground placement
- Team visibility: Allies inside can still see each other
Tactical Tips:
- Payload overtime: The absolute best use of Invisible Boundary. During final push or overtime defense, cast on payload to make your team invisible + healing for 8 seconds—nearly impossible to contest
- Ultimate trades: Use reactively to counter enemy AoE ultimates (Scarlet Witch, Luna Snow freeze). Your team goes invisible and heals through their damage
- Positioning matters: Don’t cast in open areas where enemies can spray AoE damage. Place near cover so your team can peek in/out while maintaining invisibility
- Movement consideration: Allies lose invisibility if they leave the boundary. Call out “STAY IN MY ULT” in voice/chat to prevent teammates from accidentally breaking invis
- Damage output: Invisible teammates can still attack. This creates unwinnable fights for enemies—they’re taking damage from invisible sources while your team heals 240 HP total over 8 seconds
Timing Guide:
- Offensive pushes: Cast when your team initiates onto objective. The 8-second invis window lets tanks take aggressive space without getting melted
- Defensive holds: Save for enemy ultimate combos (Doctor Strange portal → enemy dive). Going invisible breaks their setup
- Never cast when: Your team is already winning 5v3. Bank ultimate for next fight where it actually swings momentum
Common Mistake:
Players cast Invisible Boundary in the middle of lost fights. If your team is already down 3 players, 8 seconds of invisibility won’t save a 3v6. Use ultimate proactively at fight start or reactively to counter enemy engage—never desperately mid-collapse.
Team Synergies
Invisible Woman thrives in brawl compositions where her mid-range healing and shield utility enable sustained frontline pressure. Her best teammates understand how to play around Guardian Shield positioning and maximize value from her Invisible Boundary ultimate.
Best Vanguard Partners
Magneto (S+ Tier) – Perfect Frontline Duo
Magneto’s separated bubble cooldowns (Season 5 buff) pair perfectly with Sue’s Guardian Shield. When Magneto bubbles himself to push forward aggressively, drop your shield on him for stacked protection—200 HP magnetic bubble + 250 HP force field + 15 HP/second shield healing + 60 HP Orb Projection healing = unkillable tank. The meta 2-2-1 composition of two tanks, two supports, one duelist works best with this duo.
Why It Works: Magneto plays aggressive frontline bruiser, Sue’s mid-range kit keeps him sustained without requiring backline positioning.
Peni Parker (B Tier) – Area Denial Synergy
Peni’s Cyber-Webs now provide allies with 25% movement speed and 15 HP/second healing (Season 5 buff). Combine this with Guardian Shield’s healing aura and you create 30 HP/second zones where your team is nearly unkillable. Peni’s Spider-Drones also benefit from Guardian Shield protection, making them harder to destroy.
Why It Works: Both heroes excel at area control. Peni zones with mines, Sue zones with shields. Enemies must commit significant resources to break these defenses.
Groot (A Tier) – Double Sustain Composition
Groot’s Unstoppable status within 15 meters of Ironwood Walls (Season 5 buff) creates immovable defense points. Place Guardian Shield at the base of Groot’s walls to double-stack healing—Groot’s natural regeneration + Sue’s 15 HP/second shield aura + Orb Projection healing = frontline that never dies. Invisible Boundary synergizes perfectly with Groot’s stationary playstyle, making the entire defensive setup invisible during critical holds.
Venom (A Tier) – Dive Enabler
Venom’s high-mobility dive style benefits greatly from Guardian Shield. When Venom swings into enemy backline with Symbiotic Surge, pre-shield him before he lands. The 250 HP barrier + 15 HP/second healing + his self-sustain makes him nearly impossible to kill during the 2.5 second shield duration—long enough to secure kills and escape.
Best Duelist Partners
Winter Soldier (S Tier) – Ultimate Combo
Winter Soldier’s Kraken Impact (slam ultimate) becomes significantly safer with Guardian Shield. Shield him mid-ult to provide 250 HP protection during his vulnerability windows between slams. Better yet, time Invisible Boundary to coincide with his ultimate—invisible Winter Soldier slamming from seemingly nowhere is nearly impossible to counter.
Hela (S Tier) – Backline Protection
Hela is vulnerable to dive assassins due to her immobility. Guardian Shield’s 250 HP barrier gives her cushion to survive Spider-Man or Psylocke engages while you use Force Physics to peel them off. Your high HP pool (300) also lets you body-block for Hela without dying instantly.
Hawkeye (S Tier) – Sustained DPS Enabling
Hawkeye needs safe positioning to charge shots. Place Guardian Shield at Hawkeye’s angle-holding position, providing 15 HP/second passive healing so he doesn’t need to disengage when taking poke damage. Your Orb Projection can also reach his elevated positions to top him off between fights.
Punisher (S Tier) – Zone Control Duo
Punisher excels at sustained fire and zone control. Guardian Shield placed at his turret mode position provides both protection and healing, letting him maintain suppressive fire longer. Invisible Boundary creates windows where Punisher can reposition without being seen, taking new angles for maximum damage output.
Best Strategist Partners (2-2-1 Meta)
Gambit (S+ Tier) – Cleanse + Shield Combo
Gambit’s debuff cleanse removes CC from shielded targets, making crowd-controlled tanks nearly impossible to kill. His anti-heal Spades cards also cover Sue’s weakness—she has no anti-heal tool, so Gambit handles enemy sustain while Sue handles raw healing throughput. Both are mid-range supports, creating overlapping coverage zones.
Why It Works: Gambit cleanses CC, Sue blocks damage. Enemy burst combos fail when targets are both shielded and cleansed.
Luna Snow (A Tier) – Double Healing Output
Luna’s healing output + Sue’s healing output + Guardian Shield healing = team that outheals most damage. Luna’s freeze CC sets up easy targets for Psionic Vortex pulls. Her ultimate provides team-wide buffs that stack with Invisible Boundary’s healing for nearly unkillable 8-second windows.
Rocket Raccoon (S Tier) – Revive Security
Rocket’s revive ultimate gets significantly more value when combined with Guardian Shield. When Rocket revives teammates, immediately shield the revived target—the 250 HP barrier + 15 HP/second healing protects them during their brief vulnerability window post-resurrection.
Team-Up Ability: Enhanced Psionic Might (Invisible Woman + Mister Fantastic)
Activation: Automatically triggers when both heroes are on same team
Effect: Invisible Woman channels Psionic Might to fortify Mr. Fantastic, granting damage resistance and continuous Bonus Health generation to compensate for lost Health
Tactical Usage: In the current meta, without Mr. Fantastic released yet, this team-up isn’t accessible. However, once The Thing and Human Torch also join (completing Fantastic Four), the full team-up bonuses will provide additional synergies.
For a complete breakdown of all team-up abilities and their strategic applications, see our Marvel Rivals team-ups guide.
Counters & Matchups
Characters That Counter Invisible Woman
Punisher (S Tier) – DPS Check Threat
Punisher’s sustained damage output melts through Guardian Shield’s 250 HP quickly, and his hitscan weapons don’t care about your invisibility passive; he just sprays your general area until you appear. His Turret Mode damage is too high for your 300 HP pool to survive without immediate retreat.
Counterplay: Force Physics knockback can interrupt his Turret Mode briefly. Use Guardian Shield as body-block between you and Punisher, then stay in cover. Never peek angles where he has line of sight.
Iron Man (S+ Tier) – Aerial Superiority
Iron Man’s flight lets him take angles above your Orb Projection’s effective range. His Unibeam (laser ultimate) cuts through Guardian Shield’s 250 HP in under 1 second. Worse, his hitscan attacks hit you before you can go invisible since you need 5.5 seconds out of combat.
Counterplay: Save Psionic Vortex for when Iron Man dives low. The pull effect can drag him closer to your team for focus fire. Use Invisible Boundary to make your team invisible during his Unibeam—it’s one of the few counters to his ultimate.
Daredevil (S+ Tier) – True Sight Counter
Daredevil’s Radar Sense reveals invisible enemies, completely negating your Covert Advance passive and Invisible Boundary ultimate. He sees your entire team, even when they’re “invisible,” making Sue’s best defensive tool useless. His high mobility also lets him dive you repeatedly.
Counterplay: Against Daredevil, play as if you have no invisibility at all. Focus on Guardian Shield positioning and raw healing output. Request your off-tank (Venom, Magik) to dive Daredevil specifically to keep him pressured.
Psylocke (C Tier but Sue-Specific Threat) – Teleport Assassin
Psylocke’s teleportation combos can burst Sue from 300 to 0 HP in under 2 seconds if she lands her full rotation. Your Force Physics knockback doesn’t stop her momentum if she teleports again immediately. She excels at hunting isolated supports.
Counterplay: Stay near your frontline—Psylocke hesitates diving into grouped teams. When she teleports onto you, Force Physics immediately creates distance, then double jump away while spamming Orb Projection in her direction. The healing on hit gives you sustain during escape.
Hawkeye (S Tier) – Sniper Pressure
Charged headshots deal 200+ damage, nearly one-shotting you. Hawkeye controls sightlines that prevent you from freely positioning mid-range. Even when invisible, skilled Hawkeyes predict movement and land shots on your shimmer effect.
Counterplay: Play cover-to-cover. Peek only to fire Orb Projection, immediately return to cover. Use Guardian Shield as line-of-sight blocker rather than placing it on teammates—position shields to physically block Hawkeye’s sightlines.
Characters Invisible Woman Counters
Spider-Man (C Tier) – Peel City
Spider-Man’s entire kit revolves around diving backline supports, but Sue Storm has answers to everything he does. Force Physics knocks him away mid-web swing, Psionic Vortex pulls him away from kill targets, Guardian Shield blocks his burst damage, and double jump dodges his Web Cluster.
Why You Win: Spider-Man needs isolated targets to secure kills. Sue’s crowd control tools prevent isolation, keeping teammates alive long enough for them to turn and kill him.
Wolverine (B Tier) – Kiting Master
Wolverine needs extended melee range to deal damage and heal via his passive. Force Physics knockback keeps him at distance, Guardian Shield absorbs his claw strikes, and Psionic Vortex pulls him away from diving targets. His lack of ranged pressure means you can safely heal from 20 meters, where he can’t threaten you.
Iron Fist (A Tier) – Anti-Dive Kit
Iron Fist’s melee combos require close proximity. Your entire kit counters this—Force Physics interrupts his dash attacks, Guardian Shield absorbs his damage, Psionic Vortex pulls him away from targets mid-combo. Even Invisible Boundary makes his primary targets invisible, forcing him to guess locations.
Scarlet Witch (A Tier) – Ultimate Counter
Scarlet Witch’s Chaos Control (ultimate) traps teammates in rifts. Invisible Boundary provides 8 seconds of invisibility with 240 HP healing—enough sustain to survive her ultimate damage while your team repositions. The healing over time also counters her poke damage before she commits ultimate.
Storm (B Tier) – Shield Negation
Storm’s attacks are all projectile-based. Guardian Shield’s 250 HP blocks significant portions of her damage output. Her ultimate (Goddess of Thunder) pulls enemies toward center, but Invisible Boundary makes your team invisible during her ult—she can’t see where to aim pulls.
Pro Tips & Advanced Strategies
Healing Priority System
High Priority (Always Shield + Orb Spam):
- Main tank engaging enemy frontline (Magneto, Groot, Venom)
- Carry DPS with ultimate ready (Winter Soldier, Hela)
- Your second support if being dove
Medium Priority (Orb Only):
- Off-tank disrupting enemy backline
- Flanking duelists (Daredevil, Magik)
- Teammates at 60% HP but not in immediate danger
Low Priority (Ignore Until Emergency):
- Full-HP teammates in backline
- Flankers overextending 1v5 behind enemy lines
- Anyone who spam-pings for heals while standing in enemy fire
Resource Management:
Guardian Shield has limited value if left on static positions. The moment your shielded target is safe, reclaim the shield and reposition it to the next threat. This active management makes you feel 2x more impactful than passive Shield placement.
Positioning for Different Team Comps
Brawl Comp (2 Tanks, 2 Supports, 1 DPS):
Stand 15 meters directly behind your main tank. This triangle formation (tank → you → second support) creates overlapping healing zones where both supports can reach the tank but divers can’t easily target both supports simultaneously. Use Guardian Shield on the primary tank, save Force Physics for peeling dives off yourself or the second support.
Dive Comp (1-2 Tanks, 1 Support, 2-3 DPS):
Invisible Woman struggles in pure dive since her mid-range healing can’t keep up with fast-moving Duelists. If forced into dive comp, stay with your remaining tank and heal them only. Don’t chase diving teammates—they chose to overextend without support sustainability.
Poke Comp (1 Tank, 2-3 Ranged DPS, 2 Supports):
Your worst matchup. Invisible Woman’s healing requires 20-meter positioning, but poke comps want to fight from 40+ meters. If draft goes this direction, swap to Luna Snow or Adam Warlock who have better long-range sustain tools.
Ultimate Usage Framework
When To Use Invisible Boundary:
- Payload overtime: Final 10 meters of push or defense overtime—the 8-second invis + healing almost guarantees objective contest
- Counter-engage: Enemy team commits 3+ ultimates, cast yours to survive the burst and counter-attack
- Coordinated push: Your team has 2-3 ultimates ready, cast yours first so they execute combos from invisible positions
- Environmental advantage: On maps with high ground (Tokyo 2099), cast on elevated position so your team controls vision while being unseen
When To Save Invisible Boundary:
- Already winning fight 5v3—bank ultimate for next fight
- Your team is scattered across map—can’t group enough allies in 8-meter radius
- Early fight poke phase—wait for committed enemy engage before using
- Enemy has Daredevil—his Radar Sense reveals invisible allies, wasting your ult
Timing Optimization:
Cast Invisible Boundary 2 seconds BEFORE major engagement, not during. This gives your team time to position inside the boundary and start healing before chaos begins. Casting mid-fight means teammates might be outside boundary radius when it lands.
Map-Specific Tactics
Midtown (City Streets):
Play near the Bifrost elevator central structure. This gives you multiple angles to fire Orb Projection down corridors while having vertical escape via double jump if dove. Place Guardian Shield at base of elevator so teammates contesting ground level get healing while you heal from elevation.
Tokyo 2099 (Rooftop Battlefield):
Abuse high ground near central tower. Orb Projection’s piercing properties work excellently through the multi-level design—fire down from elevation and the return path continues healing allies below. Invisible Boundary on rooftops creates invisible perch where snipers (Hela, Hawkeye) can dominate unseen.
Klyntar (Symbiote Jungle):
The narrow pathways make Force Physics incredibly strong—knock divers into environmental kill zones off ledges. Psionic Vortex also excels here since enemies can’t easily path around the pull radius. Stay near jungle cover so when you go invisible, enemies lose line of sight entirely rather than tracking your shimmer.
Wakanda (Throne Room):
The wide-open objective area is dangerous for Sue. Play behind the pillars, using them as line-of-sight blockers. Guardian Shield should be placed between pillars to create healing zones that aren’t easily spammable by enemy poke. On payload defense, stay mobile—never stand still where Hawkeye/Hela can predict your position.
Competitive Callouts & Communication
Essential Callouts:
- “Shield on [player name]” (so they know they can play aggressive with 250 HP buffer)
- “Pulling [location] with vortex” (team focuses fire on pulled enemies)
- “Going invis, safe for 5 seconds” (team knows not to expect healing briefly)
- “Ulting [location] – group for invis” (coordinates Invisible Boundary usage)
- “Peeling [flanker]” (off-tank helps peel while you use Force Physics)
Team Coordination:
Ask your main tank to call engage timing: “Magneto going in 3, 2, 1” so you can pre-shield them on “1”. Similarly, coordinate Invisible Boundary with teammate ultimates—type “ULTING IN 5 SECONDS, GROUP MID” so your team stacks for the invis buff before executing combos.
Ranked Strategy:
In solo queue (no voice comms), type at match start: “Sue Storm – will shield frontline and peel backline, ping if you need urgent heals”. This sets expectations and reduces tilt when you prioritize tank over flanking DPS who overextend.
Advanced Matchup Guide
Playing Against High-Mobility Dive
When facing Spider-Man + Daredevil + Magik dive comps that specifically target supports:
Pre-Fight Setup:
- Take defensive position closer to tanks than normal (10-12 meters instead of 15-20)
- Keep Guardian Shield OFF cooldown—don’t waste it pre-fight
- Have Force Physics ready (8-second cooldown)
- Communicate dive pressure: “Watch backline, they’re hunting supports”
When Dove:
- Force Physics the first diver (knockback + distance)
- Drop Guardian Shield at your feet (250 HP buffer for yourself)
- Double jump backward toward tanks (creates distance + invis trigger)
- While invisible and mid-air, start spamming Orb Projection at divers (heals you on hit)
- Call for peel: “DOVE SUE, NEED PEEL”
Sequence creates ~400 effective HP (300 base + 250 shield – damage taken) and distance, making most dive attempts fail.
Playing Against Sniper Compositions
Against Hawkeye + Hela double sniper:
Core Principle: Never expose yourself to two sightlines simultaneously.
Movement Pattern:
- Identify sniper positions (usually high ground + long angles)
- Use terrain to block at least one sniper at all times
- Fire Orb Projection from behind cover—peek for 0.5 seconds, return to cover
- Reposition using invisible windows—go invis, relocate, re-engage
Healing Adaptation:
- Orb Projection’s return path means you can fire around corners and it’ll heal teammates on return trajectory
- Place Guardian Shield as line-of-sight blocker, not just on teammates—force snipers to reposition
- Save Invisible Boundary for when snipers ult (Hela’s Goddess of Death, Hawkeye’s Hunter’s Sight)
Playing Against Tank-Heavy Compositions
Against Groot + Magneto + Peni triple tank:
Win Condition: Out-sustain their frontline while your DPS targets their backline supports.
Strategy:
- Don’t waste Psionic Vortex trying to pull tanks—they’re too tanky to burst
- Focus Guardian Shield on YOUR tanks so frontline vs frontline battle favors your side
- Save Force Physics for when enemy tanks try to walk past yours to reach your backline
- Invisible Boundary during extended brawls (triple tank fights last 20+ seconds)
- Let your Duelist (Hawkeye, Hela) pressure enemy supports from range while you sustain frontline
Patience Game:
Tank-heavy games require patience. Don’t try flashy Psionic Vortex environmental kills—just keep your team healthier than theirs and let attrition win fights.
Common Mistakes to Avoid
Guardian Shield Management Errors
Mistake: Casting shield on full-HP teammate in safe position
Fix: Only shield teammates who are (1) taking active damage, or (2) about to engage and need proactive protection. Full-HP backline carries don’t need 250 HP barriers.
Mistake: Leaving shield on one position entire fight
Fix: Actively reclaim and reposition shield every 10 seconds. The resource should follow where threats are developing, not sit static.
Mistake: Shielding yourself when you have escape options
Fix: Save Guardian Shield for teammates—you have double jump + invisibility for self-peel. They don’t.
Invisibility Usage Errors
Mistake: Using double jump + invisibility offensively to take aggressive angles
Fix: Invisibility is primarily defensive. Save it for escaping threats, not for flanking—you’re not an assassin.
Mistake: Breaking invisibility immediately to heal teammates at 90% HP
Fix: Let Covert Advance’s 20 HP/second fully heal you to 100% HP before re-engaging (takes ~15 seconds from critical HP). Healing teammates can wait if you’re low.
Mistake: Staying invisible while team is taking heavy damage
Fix: Invisibility provides self-sustain but ZERO team value. If your team needs healing, break invis and start spamming Orb Projection even if you’re not full HP.
Positioning Errors
Mistake: Playing at backline range (30+ meters from tank)
Fix: Orb Projection is most effective at 15-20 meter range. Closer means more hits, faster healing. Playing too far back means you can’t capitalize on piercing projectiles hitting multiple allies.
Mistake: Face-tanking damage to maintain healing uptime
Fix: Dead support heals 0 HP/second. Take cover when focused, even if it means 3 seconds without healing your team. You’ll respawn and walk back faster than you’ll survive face-tanking Punisher.
Mistake: Chasing low-HP enemies with Orb Projection
Fix: Your job is supporting your team, not securing kills. Let Duelists chase. You stay with your tanks and keep them alive.
Ultimate Usage Errors
Mistake: Casting Invisible Boundary when team is scattered across map
Fix: Only cast when 3+ allies are within 8-meter radius. Otherwise the ultimate gets minimal value and you wasted it.
Mistake: Using ultimate reactively when losing 3v5
Fix: Invisible Boundary won’t save 3v5 fights. Use it proactively at fight start or save for next fight. Don’t panic-cast mid-collapse.
Mistake: Placing Invisible Boundary in open field with no cover
Fix: Cast near cover/terrain. Teammates should be able to peek in/out of invis while maintaining safety. Open-field placement means enemy AoE spam still hits your team.
Frequently Asked Questions
Is Invisible Woman good for beginners?
Yes and no. Sue Storm has a 4/5 difficulty rating because mastering her requires strong positioning sense and resource management. However, her core gameplay loop—fire orbs at teammates, drop shield on tank, use knockback when dove—is straightforward enough for newer players to generate value while learning.
If you’re completely new to hero shooters, try Luna Snow or Rocket Raccoon first. Their healing is more forgiving (Luna’s lock-on, Rocket’s Groot shoulder positioning). Once you understand team fight flow and support positioning fundamentals, transition to Invisible Woman for her higher skill ceiling and playmaking potential.
When should I use Guardian Shield on myself vs teammates?
Use Guardian Shield on yourself when:
- All escape options are on cooldown (Force Physics used, double jump still recharging)
- Being dove by 2+ enemies simultaneously
- Your team is safe, and you need temporary protection
Use Guardian Shield on teammates when:
- Main tank engaging frontline (proactive protection)
- Carry DPS at critical HP being targeted
- Your second support being dove (coordinate peel)
- Anyone about to take guaranteed damage (enemy ultimates incoming)
General rule: You have invisibility + double jump for self-peel. Teammates don’t. Prioritize shielding them over yourself 90% of time.
How do I deal with Daredevil’s Radar Sense seeing through my invisibility?
Accept that against Daredevil, your invisibility provides significantly less value. Focus instead on Guardian Shield positioning, raw healing output through Orb Projection, and crowd control peel with Force Physics and Psionic Vortex.
Against Daredevil specifically:
- Play grouped with your team (he’s less effective in sustained brawls)
- Use Guardian Shield as body-block rather than relying on invisibility escapes
- Save Invisible Boundary for when Daredevil isn’t targeting your specific group
- Request your off-tank to pressure him so he can’t free-fire into your team
Remember: Even though he can see invisible allies, your ultimate’s 30 HP/second healing is still active. It’s half as valuable but not completely useless.
What’s Invisible Woman’s role in Season 5’s 2-2-1 meta?
In Season 5’s 2-2-1 anchor tank meta (two Vanguards, two Strategists, one Duelist), Invisible Woman typically pairs with either Gambit or Luna Snow as the support duo. Your roles split:
- Primary support (Luna/Gambit): Raw healing throughput + utility (cleanse, damage boost)
- Invisible Woman (secondary support): Damage mitigation via shields + crowd control peel + healing over time
Your job is enabling your two frontline tanks (usually Magneto + Groot or Magneto + Venom) to take aggressive space without getting instantly deleted. Keep Guardian Shield active on whichever tank is taking primary focus, use Force Physics to peel divers off your primary support, and save Invisible Boundary for when enemy commits 2-3 ultimates to try breaking your frontline.
The solo Duelist (often Winter Soldier or Punisher) benefits from your Guardian Shield when they pop ultimate, and your Psionic Vortex creates kill opportunities by pulling scattered enemies into grouped positions where your DPS can focus fire.
For more 2-2-1 composition strategies and alternative meta comps, check our team compositions guide.
Should I use Invisible Boundary on cooldown?
No. Unlike some support ultimates (Rocket’s revive, which should be used liberally), Invisible Boundary is best saved for high-impact moments:
Optimal times:
- Payload overtime pushes/defenses (final 10 meters)
- Counter-engaging when enemy uses 2-3 ultimates
- Coordinated team pushes where you have 2-3 allied ults ready
- Environmental high ground control (Tokyo 2099, Midtown rooftops)
Suboptimal times:
- Already winning fight 5v3 (waste of value)
- Team scattered across map (can’t group in 8-meter radius)
- Early poke phase before commitment (save for actual teamfight)
- Against Daredevil-heavy comps (he sees through invisibility)
Aim to use Invisible Boundary 5-7 times per match in 10-minute competitive games. Holding it too long wastes value, but using it reactively without purpose is worse. Think of it as a “win this specific team fight” button, not a “press on cooldown” ability.
How do I climb ranked with Invisible Woman?
Bronze to Gold:
Focus on healing consistency. Fire Orb Projection constantly at grouped teammates. Place Guardian Shield on whoever has lowest HP. Use Force Physics whenever any enemy gets near you. At these ranks, simply out-healing enemy damage wins games.
Platinum to Diamond:
Learn to track which enemies are targeting you specifically. If Psylocke has been diving you every fight, pre-position Guardian Shield at your feet before engagements start. Start actively reclaiming and repositioning shields rather than leaving them static. Save Invisible Boundary for objective overtime clutches.
Diamond to Celestial:
Master resource optimization—never waste Guardian Shield on safe targets, time Force Physics to interrupt enemy abilities (not just reactively), place Psionic Vortex for environmental kills rather than just damage. Coordinate Invisible Boundary with teammate ultimates via voice chat. Position to heal 2-3 allies per Orb Projection rather than single-target spam.
Pro Tip for Ranked:
Duo queue with a Magneto or Groot main who understands how to play around your Guardian Shield. Solo queue relies on random tanks who might not maximize shield value. Coordinated duo queue guarantees at least your frontline knows to play aggressive when shielded.
For complete breakdown of Marvel Rivals’ ranking system, rank distribution, and what ranks can queue together, read our Marvel Rivals ranks guide.
What are the best settings and keybinds for Invisible Woman?
Keybind Recommendations:
- Guardian Shield (E or Right Click): Needs quick access for reactive shielding
- Force Physics (Shift): Standard movement key for instant peel
- Psionic Vortex (Q): Comfortable ultimate key placement
- Reclaim Shield: Bind to easily accessible key (F or Middle Mouse) for frequent repositioning
- Invisible Boundary ultimate (Z): Thumb-reach while maintaining WASD movement
Sensitivity:
Sue needs to track teammates with Orb Projection while occasionally flicking to enemies with Psionic Vortex. Recommended: 800 DPI, 5-7 in-game sensitivity (mid-range). Goal is smooth tracking for healing projectiles while being able to quickly target Guardian Shield on diving allies.
Crosshair:
Use small dot or circle with contrasting color. Orb Projection is a projectile with travel time, so minimal crosshair helps you focus on leading shots rather than precise hitscan aim.
Visual Settings:
Increase Allied Health Bar opacity to 100% and enable “Show Allied Health Bars Through Walls”. This lets you see which teammates need healing even when they’re behind cover, improving decision-making for Guardian Shield placement.
Conclusion
Invisible Woman is Marvel Rivals’ most complete all-around Strategist and a cornerstone of Season 5’s meta. Her combination of consistent healing throughput (Orb Projection), damage mitigation (Guardian Shield’s 250 HP barrier), self-sustain (invisibility passive), and team-wide utility (Invisible Boundary ultimate) makes her an S+ tier pick for players willing to invest in mastering her positioning-dependent playstyle.
Key Takeaways:
- Actively reposition Guardian Shield every 10-15 seconds rather than leaving it static
- Prioritize invisibility for self-peel, not aggressive positioning
- Fire Orb Projection to hit multiple allies via piercing properties
- Save Invisible Boundary for high-impact moments (overtime, counter-engage, coordinated pushes)
- Pair with Magneto, Gambit, or Groot for maximum synergy
Learning Curve:
Expect 10-15 hours to become comfortable with Guardian Shield management and Force Physics peel timing. By 30+ hours, you’ll predict dive threats and pre-position shields instinctively. At 50+ hours, Sue’s resource management becomes second nature and you’ll rank among the most impactful supports in any match—enabling your team to take aggressive space while keeping them alive through sustained brawls.
Finding Your Squad:
Ready to team up with players who understand proper force field positioning? Finding teammates who don’t immediately run out of your Invisible Boundary or spam-ping for heals while at 90% HP makes all the difference between solo queue chaos and organized ranked success.
Marvel Rivals supports full crossplay functionality across PC, PlayStation, and Xbox, so you can squad up with anyone regardless of platform. Use GameTree’s Discord LFG bot for instant teammate matching. Just type /lfg Marvel Rivals in any server with GameTree installed for basic matchmaking. Want personality-based matching that pairs you with players who share your communication style and playstyle? Download the GameTree app for deeper teammate compatibility.
Continue Learning
Mastering Invisible Woman is just the beginning. Explore our other Marvel Rivals resources:
- Marvel Rivals Tier List – Updated rankings for all heroes across all roles
- Team Compositions Guide – Master the 2-2-1 meta, dive comps, and counter-strategies
- Marvel Rivals Ranks – Complete ranked system breakdown, rewards, and climb strategies
- Marvel Rivals LFG Hub – Find teammates instantly through our Discord bot